Learn how to accurately annotate 3D cuboids in LiDAR point cloud data through a clear, step-by-step process designed for high-quality AI training and precise spatial understanding.
LiDAR (Light Detection and Ranging) technology has revolutionized how machines perceive the world, capturing detailed 3D point clouds that represent real-world environments with remarkable accuracy. But raw LiDAR data alone isn’t enough machines need labeled data to learn from, which is where 3D cuboid annotation comes in.
Annotating 3D cuboids in LiDAR point clouds is an essential step for developing robust models in autonomous driving, robotics, and other spatially aware applications. While the process can seem complex at first, breaking it down into clear steps makes it manageable and ensures your AI models get the quality data they need. In this guide, we’ll walk you through the entire process of annotating 3D cuboids in LiDAR point cloud data, explaining each step in a straightforward, easy-to-follow way.
What Is LiDAR Point Cloud Data?
Before we get into annotation, let’s quickly recap what LiDAR point cloud data is. LiDAR sensors emit laser pulses and measure the time it takes for those pulses to bounce back from objects. This generates a “cloud” of points in 3D space, each with X, Y, and Z coordinates, effectively mapping out the surrounding environment.
Because each point represents a tiny part of an object or surface, LiDAR data provides incredibly detailed spatial information far beyond what traditional cameras can capture.
Why Annotate 3D Cuboids in LiDAR Point Clouds?
Labeling objects in LiDAR data with 3D cuboids allows AI models to learn not only where objects are, but also their size, shape, orientation, and distance from the sensor. This is critical for tasks like:
- Detecting and tracking vehicles and pedestrians
- Navigating complex environments
- Enhancing safety in autonomous driving
- Supporting robots in object manipulation and path planning
Accurate 3D annotation leads to better detection, segmentation, and overall understanding of the environment.
Top 8 Steps for Annotating 3D Cuboids in LiDAR Point Cloud Data
Step 1: Understand the Data and Define Annotation Goals
The first step in any annotation project is to clearly understand the dataset and the specific objectives.
- Get familiar with your LiDAR data: Explore the point cloud frames to see how objects appear in 3D.
- Define annotation categories: Decide what objects you want to label (cars, trucks, pedestrians, cyclists, etc.).
- Set annotation criteria: Define rules like minimum object size, how to handle occluded objects, and labeling consistency.
Having clear guidelines upfront helps maintain quality and reduces confusion later.
Step 2: Prepare the Point Cloud for Annotation
Before annotating, ensure the point cloud data is organized and viewable from multiple perspectives. Annotators often use several views such as:
- Top-down (bird’s eye) view: Offers a clear look at object positions relative to the ground.
- Side and front views: Help capture object height and depth accurately.
- 3D perspective view: For understanding overall shape and orientation.
A clean, well-organized point cloud makes drawing precise cuboids much easier.
Step 3: Identify Objects in the Point Cloud
Next, locate objects in the LiDAR point cloud that need to be annotated. This step requires a sharp eye and spatial awareness, as LiDAR points can sometimes be sparse or noisy.
Key tips for identification:
- Look for clusters of points that form recognizable shapes (like a car or pedestrian).
- Use contextual clues like size and location relative to the sensor or other objects.
- Note partially visible or occluded objects carefully based on project rules.
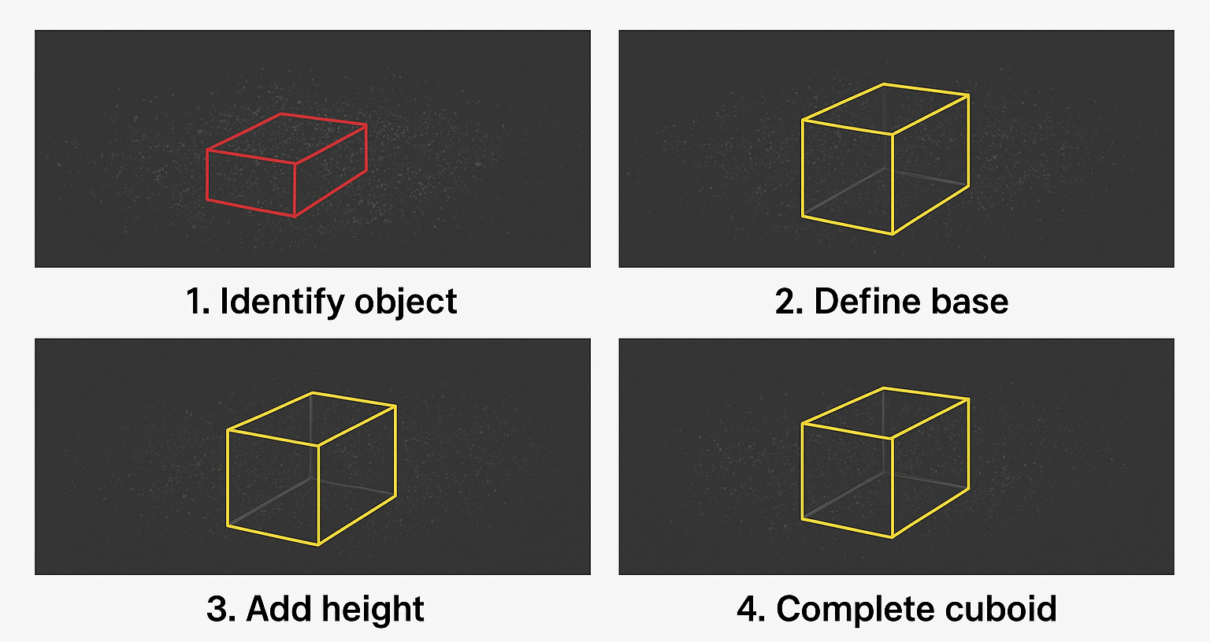
Step 4: Draw the 3D Cuboid Around Each Object
Now comes the core step: creating the 3D cuboid that tightly encloses each object.
- Position: Place the cuboid so it surrounds the object’s cluster of points.
- Size: Adjust length, width, and height to fit the object’s exact dimensions.
- Orientation: Rotate the cuboid to match the object’s real-world angle or heading. This is especially important for vehicles or elongated objects.
- Ensure accuracy: The cuboid should neither be too loose nor too tight, capturing the full object without extra empty space.
Precise cuboid annotation ensures the AI model learns the correct shape and position of objects.
Step 5: Label the Object Category
After drawing the cuboid, assign the correct label to the object based on the annotation categories defined earlier. For example, label it as “car,” “pedestrian,” “bicycle,” etc.
Consistent and accurate labeling is key to training models that can differentiate between object types reliably.
Step 6: Review and Validate Annotations
Quality control is critical. Go through completed annotations and check for:
- Proper cuboid size and orientation
- Correct labels
- Consistency across frames, especially in sequences or videos
- Handling of occlusions and edge cases as per guidelines
Reviewing helps catch errors early and improves overall dataset quality.
Step 7: Handle Complex Scenarios Thoughtfully
Real-world LiDAR data often contains challenging cases like:
- Occluded objects: Objects partially hidden behind others
- Overlapping point clusters: Objects close together or touching
- Sparse points: Far away or small objects with fewer points
Apply your annotation rules consistently in these scenarios, and when in doubt, prioritize accuracy and clarity.
Step 8: Maintain Annotation Consistency Over Time
If your project involves annotating multiple frames or a continuous sequence (like autonomous vehicle drives), ensure:
- Annotations are consistent frame-to-frame for the same object
- Labels remain uniform even if the object moves or changes perspective
- Proper tracking of objects throughout the sequence
This consistency boosts the quality of your training data and helps models learn object behavior over time.
Final Thoughts
Annotating 3D cuboids in LiDAR point cloud data is a foundational process for training AI models that understand the physical world in three dimensions. While it requires patience, precision, and spatial awareness, breaking the process into clear steps makes it manageable.
If you’re outsourcing annotation tasks, understanding these steps enables you to clearly define requirements, evaluate annotation quality, and ensure precise, consistent results that meet your project goals ultimately leading to more reliable AI model performance and efficient collaboration. With high-quality 3D cuboid annotations, your AI applications from self-driving cars to smart robots can perceive and interact with their environments safely and effectively.